Setting a custom client ID and client secret for an imported application or custom resource
Use the PingOne API to import OpenID Connect (OIDC)-based applications and custom resources from other solutions into PingOne and set a custom client ID and client secret.
This use case helps address the following scenarios:
-
Migrating applications and custom resources from other solutions, such as from PingFederate or a third-party solution, to PingOne while retaining the same client ID and client secret
-
Recovering an accidentally deleted application or custom resource using the original client ID and client secret
-
Completing the migration when you don’t have the client secret for an application or custom resource
|
You can only set a custom client ID or client secret for newly imported applications and custom resources into PingOne. You can’t set a custom client ID or client secret for existing PingOne applications or custom resources created through the PingOne admin console or API. When you set a custom client secret for imported applications and custom resources, you can optionally retain the previous client secret for a period of time (up to 90 days). Learn more in Generating a client secret for an application and Generating a client secret for a resource. |
Understanding IDs
When setting a custom client ID, it’s important to understand the difference between the different IDs in PingOne.
Client ID
The client ID is the identifier an application or custom resource (the OAuth client) uses to identify itself when interacting with PingOne as the OAuth 2.0 authorization server.
When sending an authorization request to PingOne through the browser, the URL always contains an HTTP request parameter named client_id, where the value is the identifier the application developer and PingOne administrator collaborate to set. For example:
https://sso.example.com/as/authorize?client_id=ac_oic_client&redirect_uri=https://www.example.com&response_type=code&scope=openid
where the client_id parameter value is ac_oic_client.
Application and resource IDs
The application ID and resource ID are identifiers generated by PingOne to identify the application or custom resource records as configuration objects in PingOne. These IDs are immutable.
When using the management API endpoints to manage an application or custom resource record, you must include the applicationId or resourceId value in the path, not the client_id value, so that PingOne can identify which application or custom resource record to modify.
What you’ll do
-
Import an application or custom resource into PingOne using the management API endpoints.
-
Set a custom client ID and optionally client secret for the imported application or custom resource.
-
Validate the imported application or custom resource record appears in the PingOne admin console.
Before you begin
In PingOne, you’ll need:
-
A PingOne organization and environment with the PingOne SSO service added.
-
The Environment Admin role assigned or a custom role with the applicable required permissions.
-
A worker application to make PingOne API calls on your behalf in any PingOne environment.
The worker application generates the access token the management API request uses as the authorization to import applications and custom resources. Learn more in Adding an application.
-
To assign the worker application the Environment Admin role or a custom role with the required permissions assigned.
If the worker application doesn’t have the required permissions assigned, the management API request returns an error. Learn more in Configuring roles for a worker application.
In the other solution, you’ll need:
-
Access to the other solution you’re using, such as PingFederate or a third-party solution.
-
An application or custom resource already created that you want to import into PingOne.
-
The client ID and client secret of the original application or custom resource if you’re importing an accidentally deleted application or custom resource.
Required permissions
The required PingOne permissions for this use case are as follows:
-
Import Application
-
Import Resource
-
Set Application Secret
-
Set Resource Secret
These permissions are included as part of the Environment Admin role. To assign them as part of the Environment Admin role, go to the Directory > Administrator Roles > Environment Admin > Permissions tab. Learn more about assigning administrator roles in Administrator Roles.
If you’re using a custom administrator role, you must assign these permissions manually. Learn more in Adding a custom administrator role.
Tasks
Importing an application
You can import an application from another solution, such as PingFederate or a third-party solution, into PingOne and optionally set a custom client ID.
If you need to recover an accidentally deleted application, import the application using the client ID and client secret from the original application.
Steps
-
Create a POST request to the
/applicationsmanagement endpoint:https://api.pingone.<geography>/v1/environments/<envId>/applications/
-
Configure the headers, request body, and client ID as follows:
- Header
-
AuthorizationBearer {{accessToken}}Content-Typeapplication/json - Body
-
raw and JSON
The following is a sample request body:
{ "name": "{{$timestamp}} imported app", "clientId": "{{$timestamp}}_myClientId", "clientSecret": "myClientSecret", "enabled": false, "type": "WEB_APP", "protocol": "OPENID_CONNECT", "responseTypes": [ "CODE" ], "pkceEnforcement": "REQUIRED", "redirectUris": [ "https://www.example.com" ], "grantTypes": [ "AUTHORIZATION_CODE" ] }-
The
clientIdproperty is required and must be unique within the environment. The minimum length of the client ID is 8 characters. -
The
clientSecretproperty is optional when importing an application. If you omit it, PingOne generates a client secret for the application. -
The
enabledproperty is set tofalseto prevent unintended traffic before configuration is complete and validated.
-
Send the request.
Result:
When you import the application, PingOne generates a client secret if you didn’t include it in the request. You can optionally set a custom client secret after the initial import.
Validation
When the application is imported using the API, you can view the imported application in the admin console:
-
In the PingOne admin console, go to Applications > Applications and browse or search for
imported appto filter only imported applications. -
Click the desired application entry to open the details panel.
-
(Optional) To generate a new client secret, click Generate New Secret on the Configuration tab.
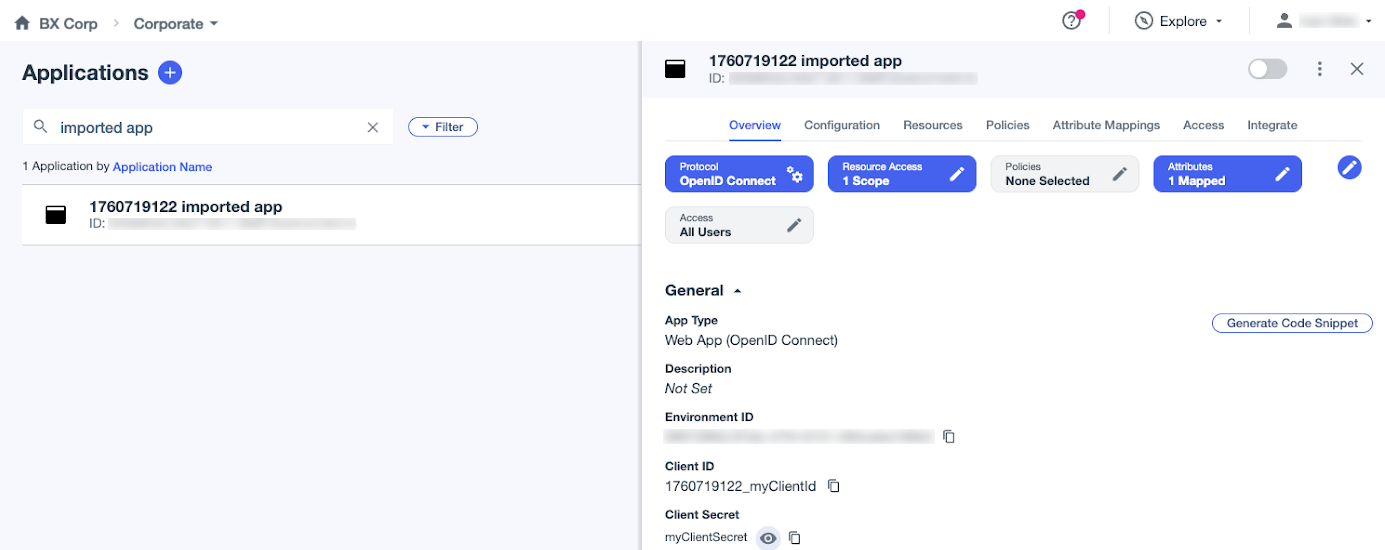
You can also use the API to get data about the imported application to validate the import was successful. Learn more in Read One Application in the PingOne API documentation.
Setting a custom client secret for an imported application
After importing an application, you can use the management API to set a custom client secret for the application.
Steps
-
Create a POST request to the
/applications/{applicationId}/secretmanagement endpoint.https://api.pingone.com/v1/environments/<envId>/applications/<applicationId>/secret
-
Configure the headers, request body, and client secret as follows:
- Header
-
AuthorizationBearer {{accessToken}}Content-Typeapplication/vnd.pingidentity.secret+json - Body
-
raw and JSON
The following is a sample request body:
{
    "secret": "myNewClientSecret"
}
where
myNewClientSecretis an example custom client secret.The minimum length of the client secret is 8 characters.
-
Send the request.
Validation
When you set a custom client secret for an imported application using the API, you can view it in the admin console:
-
In the PingOne admin console, go to Applications > Applications.
-
Browse or search for the imported application.
-
Click the desired application entry to open the details panel.
Result:
The custom client secret displays on the Overview tab. In this example, myNewClientSecret.
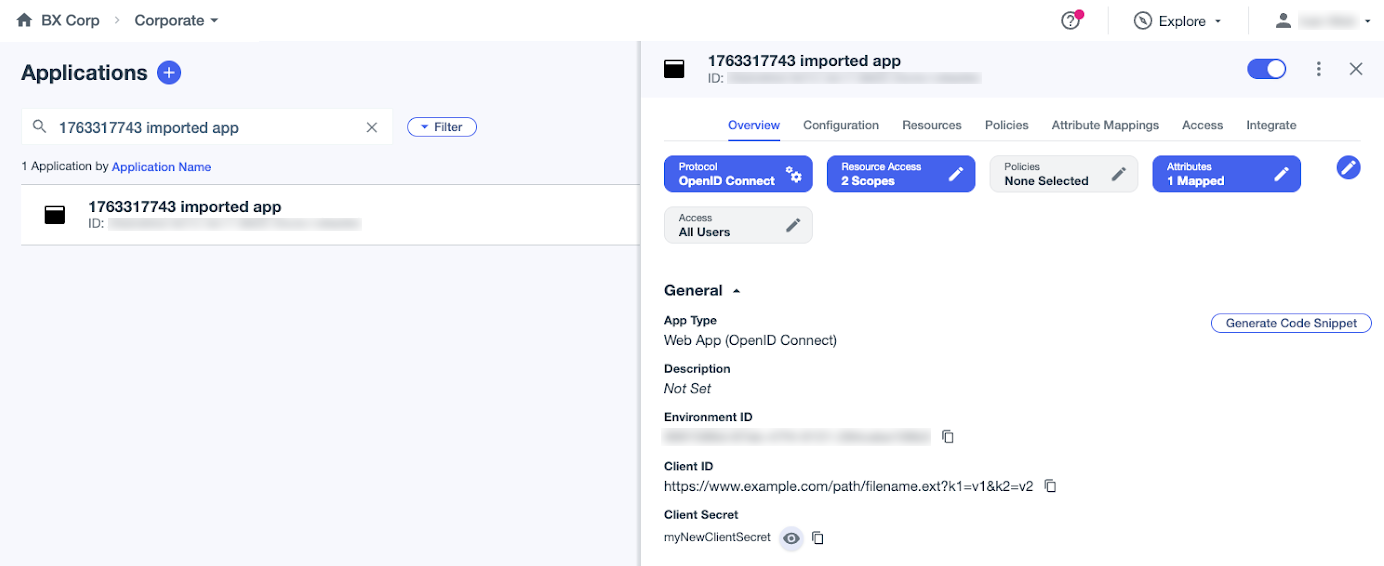
You can also use the API to retrieve the application client secret to validate it was set. Learn more in Read Application Secret in the PingOne API documentation.
Importing a custom resource
You can import a custom resource from another solution, such as PingFederate or a third-party solution, into PingOne and optionally set a custom client ID.
If you need to recover an accidentally deleted custom resource, import the custom resource using the client ID and client secret from the original resource.
Steps
-
Create a POST request to the
/resourcesmanagement endpoint.https://api.pingone.<geography>/v1/environments/<envId>/resources/
-
Configure the headers, request body, and client ID as follows:
- Header
-
AuthorizationBearer {{accessToken}}Content-Typeapplication/json - Body
-
raw and JSON
The following is a sample request body:
{ "name": "{{$timestamp}} imported resource", "clientId": "{{$timestamp}}_myClientId", "clientSecret": "myClientSecret", "audience": "https://www.example.com/{{$timestamp}}" }-
The
clientIdproperty is required and must be unique within the environment. The minimum length of the client ID is 8 characters. -
The
clientSecretproperty is optional when importing a custom resource. If you omit it, PingOne generates a client secret for the resource.
-
Send the request.
Result:
When you import the custom resource, PingOne generates a client secret if you didn’t include it in the request. You can optionally set a custom client secret after the initial import.
Validation
When the custom resource is imported using the API, you can view the imported resource in the admin console:
-
In the PingOne admin console, go to Applications > Resources.
-
Browse or search for
importedto filter only imported custom resources. -
Click the desired custom resource entry to open the details panel.
-
(Optional) To generate a new client secret, click Generate New Secret on the Overview tab.
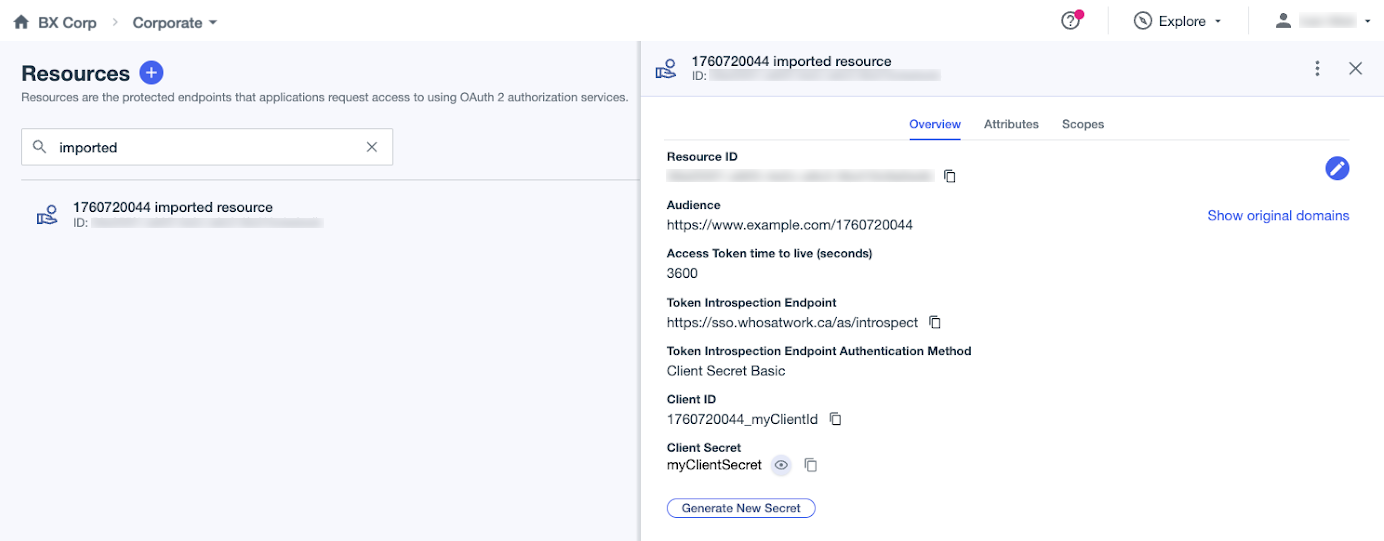
You can also use the API to get data about the imported custom resource to validate the import was successful. Learn more in Read One Resource in the PingOne API documentation.
Setting a custom client secret for an imported custom resource
After importing a custom resource, you can use the management API to set a custom client secret for the resource.
Steps
-
Create a POST request to the
/resources/{resourceId}/secretmanagement endpoint.https://api.pingone.<geography>/v1/environments/<envId>/resources/<resourceId>/secret
-
Configure headers, the request body, and client secret as follows:
- Header
-
AuthorizationBearer {{accessToken}}Content-Typeapplication/vnd.pingidentity.secret+json - Body
-
raw and JSON
The following is a sample request body:
{
    "secret": "myNewClientSecret"
}
where
myNewClientSecretis an example custom client secret.The minimum length of the client secret is 8 characters.
-
Send the request.
Validation
When you set a custom client secret for an imported custom resource using the API, you can view it in the admin console:
-
In the PingOne admin console, go to Applications > Resources and browse or search for the imported custom resource.
-
Click the desired custom resource entry to open the details panel.
Result:
The custom client secret displays on the Overview tab. In this example, myNewClientSecret.
You can also use the API to retrieve the custom resource client secret to validate it was set. Learn more in Read Resource Secret in the PingOne API documentation. Use the API response to confirm the imported client secret value.
Troubleshooting
-
When using the management API endpoints to manage an application or custom resource record, make sure the path contains the
applicationIdorresourceIdvalue, not theclient_idvalue, so that PingOne can identify which application or custom resource to modify. -
Verify the worker application has the required permissions assigned in PingOne. Otherwise, the management API requests will return an error. Learn more in Required permissions and in Response codes in the PingOne API documentation.