Adding an experience - Username and Password (early access)
You can add sign-on experiences from the PingOne Design Center.
The Username and Password experience is a common sign-on experience in which users enter a username and password to authenticate.
Before you begin
You must have the Environment Admin role or a custom role with equivalent permissions to add experiences.
Steps
-
In the PingOne admin console, go to Orchestration > Design Center and click the Plus icon ().
-
On the Choose a Sign-On Pattern page, click Username and Password, then click Next.
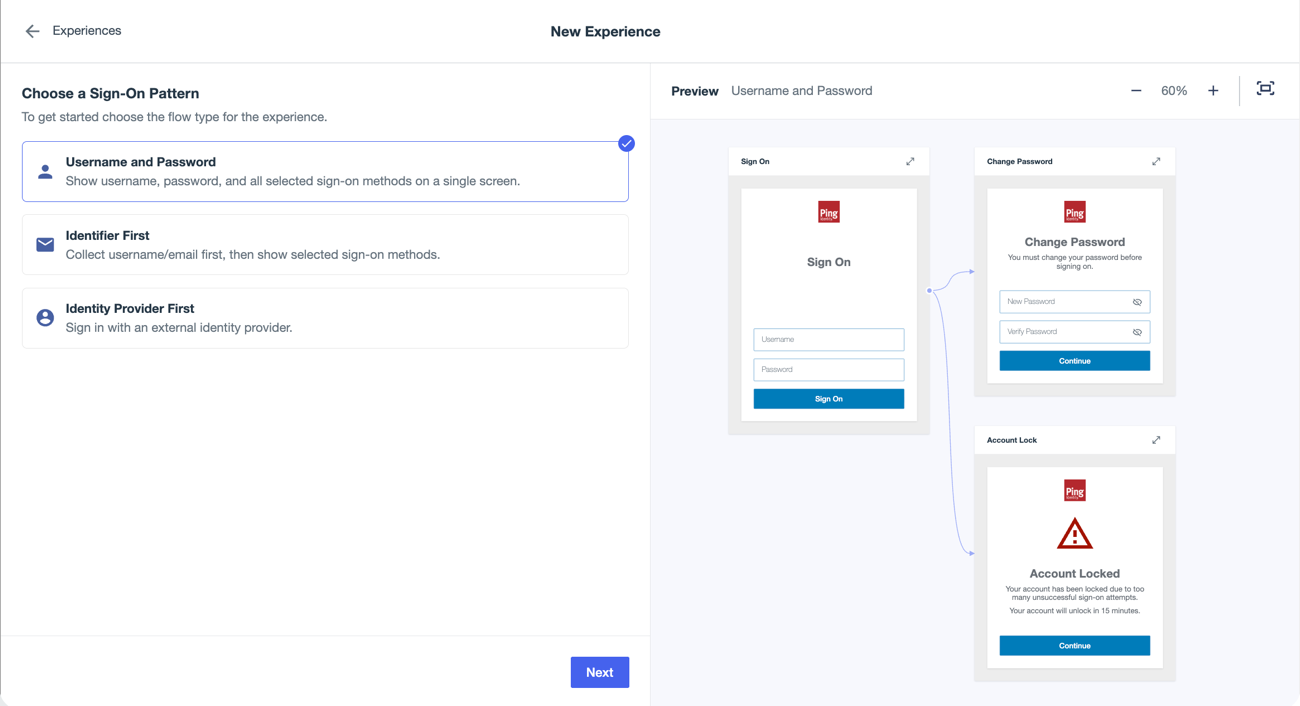
You configure the experience using controls in the left pane. As you update your configuration, the Preview pane on the right updates to display a visualization of the experience you’re building.
-
On the Details tab, enter a name and description for the experience, then click Next.
-
(Optional) On the First Factor tab, configure additional primary sign-on methods and the Remember Username and Session Timeout options.
You can select multiple sign-on methods.
Method Description Password
Password is selected by default because you selected the Username and Password sign-on pattern.
Passkey (FIDO2) Sign-On
Select to allow users to sign on using device-level credentials according to the FIDO2 standard.
You must have at least one multi-factor authentication (MFA) policy that allows FIDO2 authentication configured in the environment to select this option. Learn more in Configuring FIDO2 authentication (Passkeys).
After you select this option, select the applicable policy from the MFA Policy list.

Identity Providers
Select to allow users to authenticate using an external identity provider (IdP), such as Google, Facebook, or a custom OIDC or SAML provider.
You must have at least one IdP configured in the environment to use this option. Learn more in External IdPs.
After you select this option, select an IdP from the Identity Providers list and click Add Identity Provider.

You can add multiple IdPs by clicking Add another Identity Provider. If you select more than one, users can choose which IdP to use when signing on.
Click the More Options (⋮) icon and select Edit Identity Provider to view and edit the IdP in a new tab, or click Remove to remove the IdP from the list.
Remember Username
The Remember Username option is independent of the sign-on methods you select.
Select to save the username for users that have authenticated successfully at least once. The user must still provide their password or other credentials to complete sign-on.
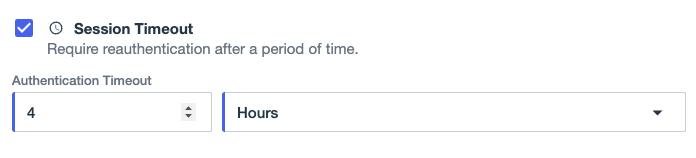
Session Timeout
The Session Timeout option is independent of the sign-on methods you select.
Select to require users to reauthenticate after the specified time period.
After you select this option, configure the time period by selecting a number and a unit of time in the Authentication Timeout fields. For example, if you select 4 Hours, users must sign on again if their last sign-on was more than 4 hours ago.
If you configure PingOne Protect features in your experience, the risk policy might override this setting based on the policy settings and whether or not a potential security risk is indicated. Learn more in Risk policies.
-
Click Next.
-
(Optional) On the MFA and Security tab, select Enable Multi-Factor Authentication to require MFA in the experience, then configure the MFA settings:
Method Description Multi-Factor Authentication
Select one of the following two options for MFA:
-
Adaptive MFA (Risk-based)
Applicable only to environments that include PingOne Protect.
After you select this option, select a risk policy in the Policy to Evaluate list.
Based on the selected policy, risk signals are evaluated to determine whether to require users to complete an MFA step. For example, the policy might require MFA only when a user is signing on from a new device or location.
This list only shows risk policies that include a mitigation rule configured to support MFA. The Returned Action for the mitigation must be one of the following:
-
Deny: Don’t allow the user to sign on if the risk policy is triggered.
-
MFA: Prompt the user to complete an MFA step if the risk policy is triggered.
-
Approve: Allow the user to sign on without requiring MFA even if the risk policy is triggered.
Learn more in Risk policies.
-
-
Standard MFA
You must have at least one MFA policy configured in the environment to use this option.
After you select this option, select an MFA policy in the Policy to Evaluate list. Based on the policy, users must confirm their identity during sign on using a second factor enabled in the policy. Learn more in Configuring an MFA policy for strong authentication.

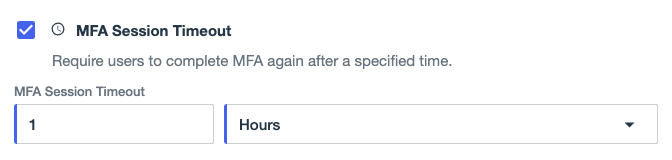
MFA Session Timeout
Select to require users to complete MFA again after a specified time period. This option is independent of the Session Timeout option, which determines when users must reauthenticate with their primary credentials. With MFA Session Timeout enabled, users must complete an MFA step again if their session exceeds the specified time period.
After you select this option, configure the time period by selecting a number and a unit of time in the MFA Session Timeout fields. For example, if you select 12 Hours, users must complete an MFA step again if their last MFA prompt was completed more than 12 hours ago.
If you’ve enabled adaptive (risk-based) MFA in the experience, the risk policy might override this setting based on the policy settings and whether or not a potential security risk is indicated. Learn more in Risk policies.
MFA Enrollment
Select to allow users to sign on with just their username and password, but then require them to configure a second authentication method, such as a passkey or one-time passcode (OTP).
After you select this option, select the applicable MFA policy from the Policy to Evaluate list. Allowed methods are determined by the MFA policy you select.
To require users to enroll in MFA during sign-on, select the MFA Enrollment Required checkbox. If disabled, users who didn’t enroll an MFA device during registration are prompted to enroll during their next authentication.
-
-
Click Next.
-
(Optional) On the Account Recovery tab, select Allow Account Recovery to enable users to recover their accounts if they forget their password.
An OTP is sent to the email address configured in the PingOne user directory for account recovery.
If your environment includes PingOne Protect, after selecting Allow Account Recovery you can select a risk policy from the Policy to Evaluate list. Selecting a risk policy allows you to evaluate risk signals and prevent unauthorized account recovery attempts. For example, the policy might block account recovery attempts from certain locations or devices, or require users to complete an MFA step to recover their account. Learn more in Risk policies.
-
Click Next.
-
(Optional) On the Registration tab, select Allow Registration to let users register for an account if they don’t have one yet.
After you select this option, configure the following registration settings:
Setting Description Population
Select the population to add users to when they register using this experience. You can select only one population for registration.
Attributes to Collect
Email Address and Password are required and selected by default. Email Address is also used as the Username for users that register through this experience.
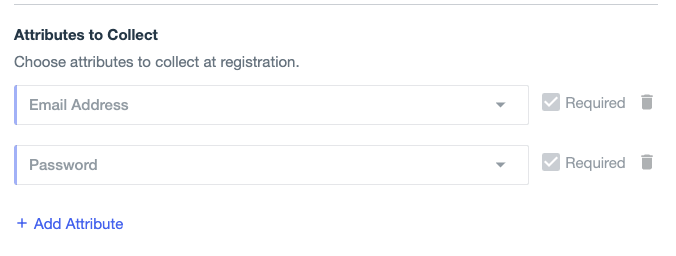
Click + Add Attribute to select additional attributes to collect during registration. You can select from standard attributes that are configured in the environment directory.
Select the Required checkbox to require users to provide a value for an attribute. If Required isn’t selected, the attribute is optional.
The attributes you select are added to the registration form in the order you select them.
Click the Delete icon () to remove an attribute.
Learn more about user attributes in User Attributes.
MFA Enrollment
Select to allow users to configure a second authentication method, such as a passkey or one-time passcode (OTP), during the registration process.
If you selected a passwordless sign-on method on the First Factor tab, this option is selected by default, but you can clear the checkbox to remove it.
After you select this option, select the applicable MFA policy from the Policy to Evaluate list. Allowed methods are determined by the MFA policy you select.
To require MFA enrollment during the registration process, select the MFA Enrollment Required checkbox. If this option is disabled, MFA enrollment during registration is optional during registration.
Account Verification
Select the Require Verification checkbox to require users to verify their email address by entering an OTP sent to their email to complete the registration process. This option uses the email address collected during registration and stored in the PingOne user directory.
Account verification is a one-time process that occurs only during registration. It is not an MFA step.
Bot Detection
Applicable only to environments that include PingOne Protect.
Select the Enable Bot Detection checkbox to help prevent denial-of-service (DOS) attacks and the creation of fake user accounts by detecting non-human behavior, automated frameworks, and recorders.
After you select this option, select the applicable policy from the Risk Policy list. Learn more in Risk policies.
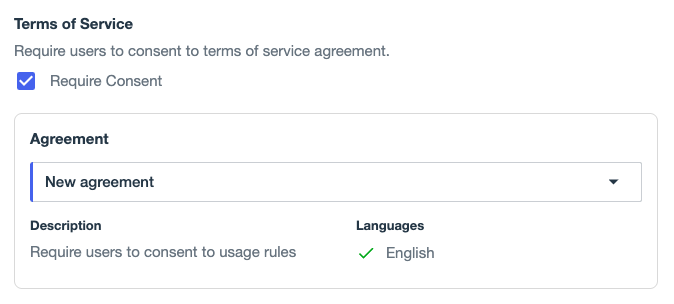
Terms of Service
You must have at least one agreement configured in the environment to use this option. Learn more in Agreements.
Select the Require Consent checkbox to require that users consent to a terms of service agreement when they register for an account.
After you select this option, select the applicable agreement from the Agreement list.
The agreement description and available languages display for your review.
-
Click Next.
-
On the Branding & Theme tab, select a theme to apply to the experience.
-
By default, the active theme for the environment is selected. Click a different theme to select it.
The Preview pane updates to show the experience with the new theme applied.
-
Click the More Options (⋮) icon and select Edit to view and edit the theme in a new tab, or click the Create a new theme link to add a new one. Learn more in Branding and Themes.
-
-
Click Next.
-
On the Summary tab, review the selections you’ve made for your authentication experience.
-
Click Save.
Result
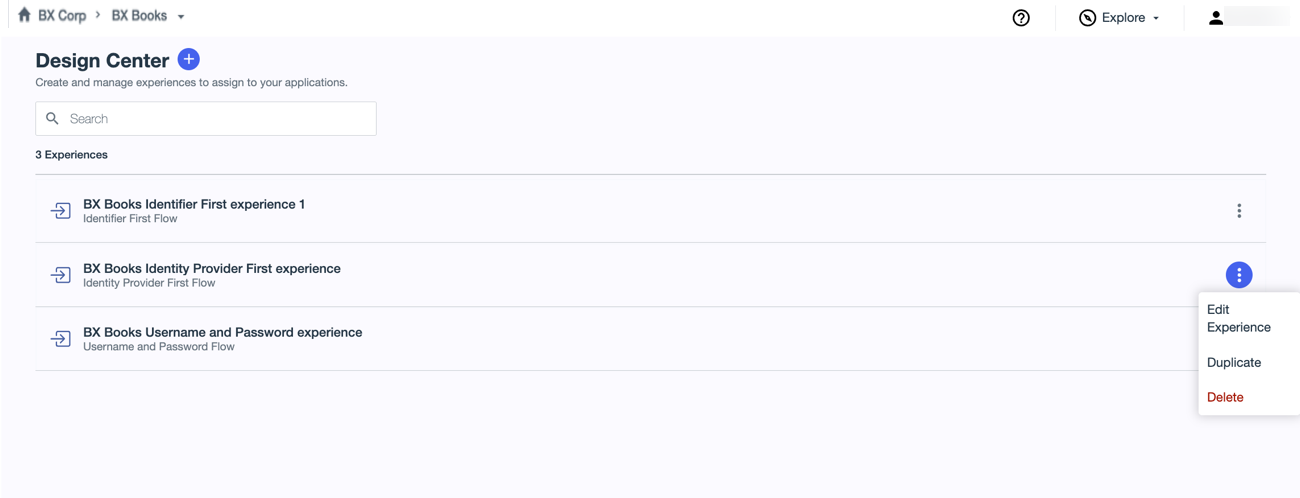
After you save the experience, you’re returned to the Design Center and the following occurs:
-
The new experience is available in the list of available experiences in the Design Center. You can edit, duplicate, or delete experiences from this list.
-
The unique read-only sign-on and registration forms for the experience are listed in the Design Center Forms section of the DaVinci Forms page. You can view the forms, but you can’t edit them directly. If you want to customize the forms, you can duplicate them and edit the copies. Learn more in Forms.
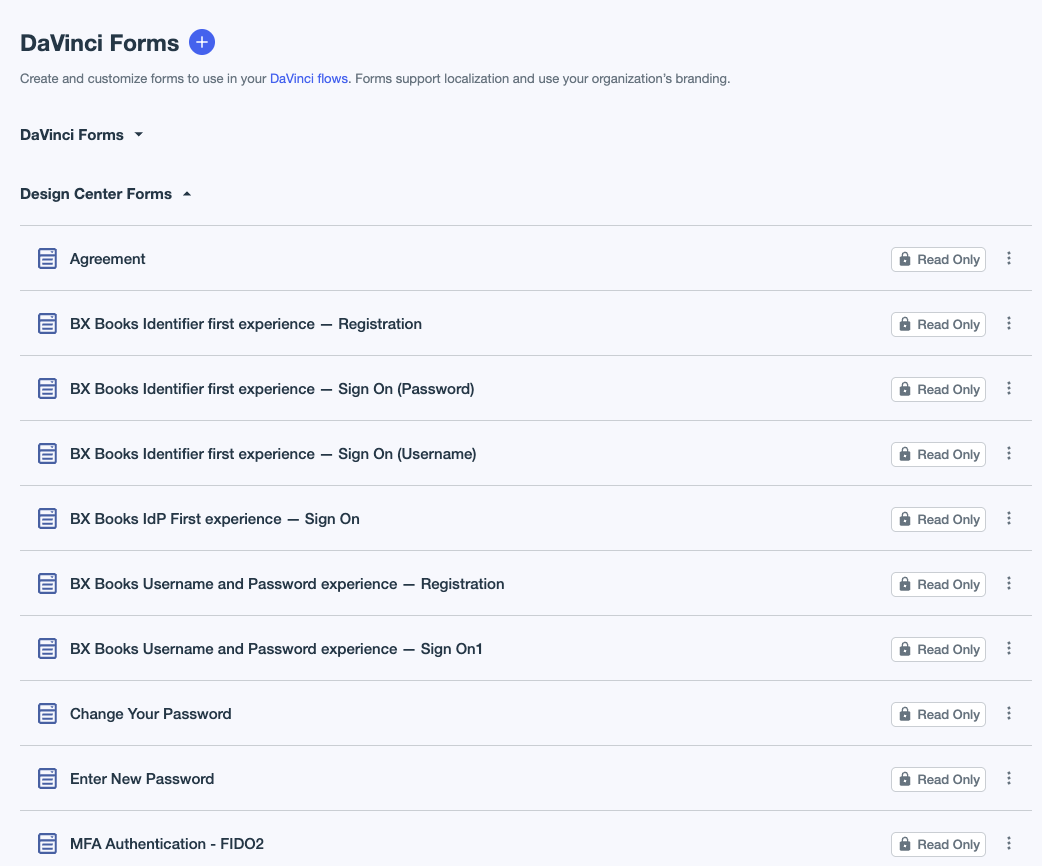
If you created an Identity Provider First experience or another experience for which you didn’t enable registration, there won’t be a registration form.
Additional read-only forms are created and shared across experiences.
-
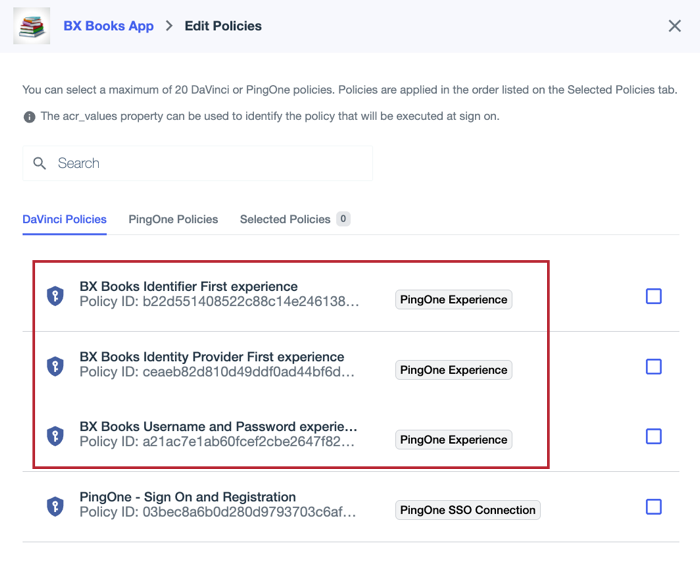
The experience is available on the Policies tab for applications as a DaVinci flow policy that you can assign to the application. Learn more in Authentication policies for applications and Applying authentication policies to an application.
-
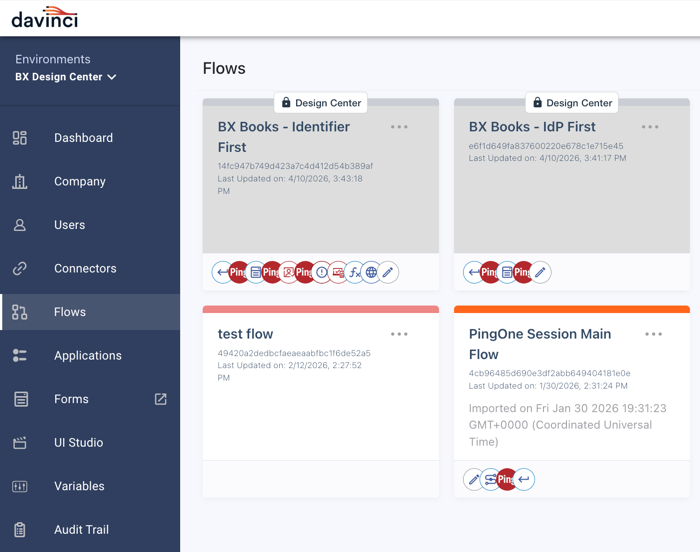
The experience is available in the PingOne DaVinci admin console as a read-only DaVinci flow. If you want to view the flow, you can click DaVinci in the PingOne sidebar to open the DaVinci admin console, and then click Flows. The applicable flows include a Design Center label.
If you want to refine your experience further to use it for more complex use cases, you can clone and edit the flow in DaVinci.
You must have the DaVinci Admin role or a custom role with equivalent permissions to clone and customize these flows. If you only want to view the flow, you can have the DaVinci Admin Read Only role or a custom role with equivalent permissions.
Learn more in Cloning a flow and How to manage flows in the DaVinci documentation.